
Table of Contents
Direct answer
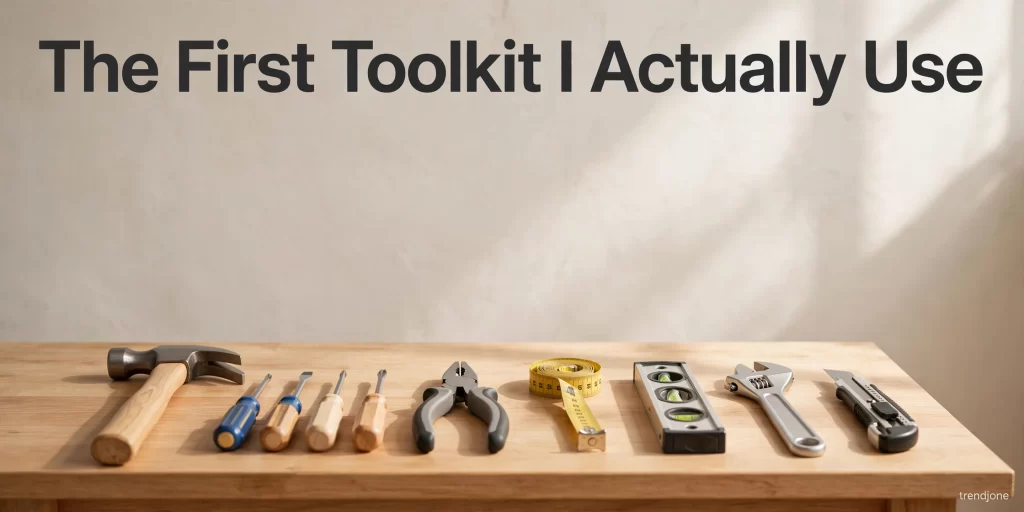
A first home toolkit needs just seven tools: a claw hammer, a Phillips screwdriver and a flathead screwdriver, combination pliers, an adjustable wrench, a 5-metre measuring tape, a small spirit level, and a utility knife. With those seven, you can tighten, hang, assemble, measure, cut, and fix almost every small household job — loose hinges, wobbling chairs, new shelves, curtain rods, dripping taps, and flat-pack furniture. Buy decent quality in these seven before buying anything else, keep them in one box you can actually find, and learn one job at a time.
A 100-piece kit looks impressive and mostly stays shut; seven tools you know by name get used every week. These are the first home toolkit essential tools to own before anything breaks.
Intro
I bought my first toolbox the way most people do: a big red 100-piece set, on sale, because more tools felt like more capability. It sat in a cupboard for two years. Whenever something broke, I still called someone, because opening that box felt like opening an exam I had not studied for. Which of these fifty bits fits this screw? Why are there three hammers? What is that thing with the teeth? That big red box was not the first home toolkit essential tools I needed.
The truth I learned slowly is that capability is not the size of the box. It is knowing seven tools well enough to reach for them without thinking. Today my kit is a small bag, not a chest, and it handles nearly everything in my home. The seven tools below are the ones that earned their place — not by being fancy, but by being used. These seven are the first home toolkit essential tools I actually use. I reach for the right tool every time.
1. A Claw Hammer (and Learning to Hit Straight) — First Home Toolkit Essential Tools
The claw hammer is the most misunderstood tool in the house. People think it is for hitting nails hard. It is actually for hitting nails straight, and for pulling out the ones that went in wrong — that is what the claw is for. It is the first of the first home toolkit essential tools to learn properly.
Buy a medium one, around 450 grams, with a comfortable grip. Heavier hammers tire your wrist and encourage wild swings; lighter ones bounce off the nail. Hold it near the end of the handle, not near the head — the handle is a lever, and choking up on it throws away the leverage. Start with light taps to set the nail, then firmer swings, and keep your eye on the nail head, not on the hammer.
One honest warning: the first time you use a claw to pull a nail, it will feel like you are about to break something. Put a small piece of cardboard or wood under the claw head so it does not dent the wall or furniture. That one habit separates a clean removal from a repair job on top of a repair job.
2. Two Screwdrivers That Fit Real Screws — First Home Toolkit Essential Tools
Screwdrivers are where cheap kits fail hardest. A driver that almost fits a screw will chew up the screw head, and then nobody can remove it — not you, not the handyman you eventually call. This is the single most common beginner mistake, and it is entirely avoidable. Fit is what makes them first home toolkit essential tools.
You need two: a Phillips (cross-head) in the common household size, and a flathead of medium width. Better still, buy one good handle with interchangeable bits in the sizes you actually meet — but check the bits are proper hardened steel, not soft metal that twists on the first stubborn screw.
Test the fit before you turn. The driver should sit in the screw head with almost no wobble. If it rocks, it is the wrong size, and turning it will damage the screw. And keep a small magnet nearby: a magnetised tip holds the screw while you start it one-handed, which matters when you are holding a shelf with the other hand.
3. Combination Pliers
If the hammer is the tool everyone buys, pliers are the tool everyone underestimates. Combination pliers grip, twist, bend, pull, and cut thin wire — and they are the tool for all those jobs that are too small for a wrench and too stubborn for fingers. Pliers are first home toolkit essential tools every beginner underestimates.
The jobs they quietly handle: pulling a nail that is too short for the claw, straightening a bent hook, holding a nut while you turn the bolt from the other side, gripping a stripped screw head, cutting a piece of wire or a cable tie. I reach for mine more than any other tool except the screwdriver.
Buy ones with comfortable, non-slip grips and jaws that close cleanly with no gap. Cheap pliers with wobbly jaws slip at the worst moment — usually onto your knuckles. Good pliers cost a little more and last decades; this is the wrong place to save money.
4. An Adjustable Wrench
Nuts and bolts come in many sizes, and buying a full spanner set for a first kit is overkill. One adjustable wrench, around 200mm, covers the sizes a home actually produces: tap fittings, furniture bolts, bicycle nuts, the nut under the sink. An adjustable wrench belongs in first home toolkit essential tools.
The trick is to adjust it snugly every time. An adjustable wrench that is even slightly loose will round off the corners of a nut, and a rounded nut is a much bigger problem than a tight one. Fit it, tighten the jaw until it grips with no play, and pull — never push if you can avoid it, because when a wrench slips, your hand goes where your force was going.
Also: the adjustable wrench is not a hammer, no matter how tempting it looks when you are already holding it. I have done it. It damages the wrench jaw and it is a good way to hurt yourself. Keep the hammer for hammering.
5. A 5-Metre Measuring Tape
Almost every home mistake I have made started with guessing a measurement. A curtain rod bought too short, a shelf that did not fit the wall, a washing machine space measured by eye. The measuring tape is the cheapest tool in the kit and the one that prevents the most wasted money. A tape is one of the first home toolkit essential tools for every home.
Five metres is enough for a home; longer tapes are heavier and harder to handle indoors. Learn the two features most people ignore: the little hook at the end moves slightly on purpose (it accounts for its own thickness when measuring inside versus outside edges), and the belt clip exists so the tape is on you instead of in another room when you need it.
Measure twice, write it down, and measure the space as well as the thing going into it. “The shelf is 90 cm” is useless if you never measured the wall. Both numbers, on paper, before buying anything.
6. A Small Spirit Level
A spirit level is a small thing that makes a big visual difference. A shelf that is off by even a little looks wrong forever, and you will notice it every single day — guests may not say anything, but you will see it every time you walk past. A level is one of the first home toolkit essential tools for straight shelves.
A 30 cm level is enough for shelves, frames, and curtain rods. Place it on top of the object, adjust until the bubble sits between the lines, and mark your holes. For longer things like curtain rods, mark one end level, then measure across from that mark rather than trusting the level across the whole span.
One honest note: walls are rarely perfectly straight, and sometimes “level” and “looks right against this wall” disagree slightly. In a lived-in home, level wins for shelves (things slide off a tilted shelf), while picture frames can follow the eye. Know which kind of job you are doing.
7. A Utility Knife
The utility knife is the quiet workhorse: opening boxes without tearing, trimming, cutting rope and tape, scoring cardboard, stripping a bit of packaging, sharpening a pencil in a pinch. A sharp blade is safer than a dull one, which is the opposite of what beginners assume — a dull blade needs force, and force is what slips. A knife rounds out the first home toolkit essential tools.
Buy one with a retractable blade and a pack of spare blades, and change the blade the moment it starts dragging. The snap-off kind is fine if you snap safely, away from your body and into a bin. And always retract the blade before it goes back in the box — an open blade in a toolbox is a surprise nobody wants.
The One Rule That Keeps Them Useful
Here is the rule that matters more than any brand: the tools live in one place, and they go back after every job. Not “mostly”, not “in that drawer somewhere”. One box, one bag, one shelf — and every tool returns to it before the job counts as finished. One place is the rule for first home toolkit essential tools.
The reason is simple. A toolkit you cannot find in two minutes is a toolkit you do not own. Every time I have called someone for a five-minute job, the real reason was that I could not find the pliers, not that I could not do the job. Put the kit where you will look first, and keep it small enough that it fits there. They all fit in one drawer tool kit by the door.
What Not to Buy Yet
Skip the power drill until you have used these seven for a few months — you will know exactly which drill you need by then, and you will already own the measuring, marking, and fixing skills it assumes. Skip speciality tools (tile cutters, pipe wrenches, staple guns) until a real job demands them; buying ahead of need is how cupboards fill with boxes that never open. And skip the cheapest set on the shelf: one decent screwdriver beats ten soft ones that strip screws. Skip the drill until the first home toolkit essential tools feel natural.
FAQ
Do I really need only seven tools to start? Yes, for ordinary home jobs — tightening, hanging, assembling, measuring, cutting, and small repairs. These seven cover the jobs most homes produce in a year. Add tools when a real job demands one, not before. Seven tools cover the first home toolkit essential tools for ordinary home jobs.
How much should a first toolkit cost? A decent set of these seven, bought individually or as a small quality kit, typically costs less than one visit from a handyman for a small job. Spend the most on the screwdrivers and pliers, where quality shows immediately.
Should I buy a big 100-piece kit instead? Only if you will actually learn what is in it. Most beginners use the same seven tools from a big kit and ignore the rest. Start small, learn the seven, and let the kit grow with your skills.
What is the most common beginner mistake? Using a screwdriver that does not fit the screw, which strips the screw head. Always test the fit first — the driver should sit in the head with almost no wobble.
Where should I keep my toolkit? In one box or bag, in the place you will look first — near the entrance, in a utility corner, or on one shelf. If it takes more than two minutes to find, it will not get used. Renters can start with DIY home repair tools too.
When should I call a professional instead? For anything involving mains electricity, gas, structural changes, or water inside walls. These seven tools are for small, safe jobs; knowing the boundary is part of owning tools.
The Bottom Line
A first toolkit is not a purchase, it is a habit: seven tools you know by name, in one place you can find, used on small jobs until they feel natural. Hammer, two screwdrivers, pliers, adjustable wrench, measuring tape, spirit level, utility knife — that is the whole list, and it is enough. Buy them decent, keep them together, and the next time something loosens, wobbles, or needs hanging, you will fix it yourself in ten minutes, and wonder why you ever waited for someone else.
That is the whole point of first home toolkit essential tools: seven tools, one place, used often. I proved it with three fixes in one weekend — a wobbly table, a squeaky door and a sagging shelf.